
Why Adding Variation?
Working with modularity means reusing the same models and blocks as mentioned earlier to save polycount and texture space. It also means using seamless repetitive textures. This being said, the environment will look robotic and kind of fake.
Therefore, we need to add variation to give this realistic and organic feel to our world. In my scene, this could be achieved by adding some meshes, moving some meshes around, adding dirt, stains, leaks etc…
Since the environment is just after the outbreak of the virus and the clashes between survivors and zombies. So I would add some oil stains, some dirt and dust, some leaks etc …
Sliding Doors Glass
For one of the first examples that I had added, variations were in the sliding door: I used many glass meshes to add variation. I modeled more than one broken glass meshes, and in engine I created the various blueprints
 |  |  |
|---|
4
False Ceiling
As for the false ceiling I modeled four different broken and damaged tiles, and for the light tile modeled one damaged iteration and one intact. After deciding to go back up one level in modularity, I assembled the false ceiling in maya and grouped them into 4 groups. Stripped many tiles and removed some of the elements that fix the tiles in place, and added a couple of tiles hanging.
 |  |  |
|---|
Corridor Zone
The corridor area was very repetitive and looking dull. I decided to model an elevator and add a WC door. Doing that made the corridor more realistic. I also added a door to the office.
 |  |  |
|---|
In the result of the outburst of the virus a resistance was born. Graffiti of the resistance logo would be found around the petrol station walls to signal the presence of survivors in the area. Not to mention also the usage of other graffiti around on the inside walls of the shop or on the outside walls of the petrol station.
Graffiti


Side Bricks
Since the side bricks will be used a lot in my scene (in the side walk, the pavements, the base of the pumps etc…), the repetition of the mesh gave a very un-naturalistic and repetitive view. I decided then to model and alter the mesh I had into 3 different variations. On top on the mesh variation, I also did some texture variation. Those three variations provided me with what is needed to have a more realistic view.
 |  |  |  |
|---|
Gondola Shelves
The interior of the shop has to reflect the aftermath of breaking and entering of survivors or zombie like humans seeking food and supplies. So the gondola shelves had to be knocked up and some destroyed and torn apart. Using the same techniques for mesh and texture variations to give the more realistic look and feel that is requested.
 |
|---|
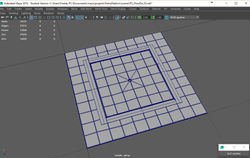
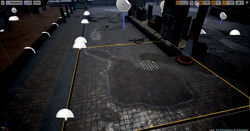
Outside Floor
The Outside Floor is one of the most important parts of my scene since it covered a large area of my environment. So as you would expect, applying variation on such a large area is definitely required. I modeled a couple of meshes to be added to the floor; a rounded sewer cap and a square cap.
After the insertion of the sewer caps in various blueprints of the floor, the repetitive feel remained. So I also had to have some mesh variation in the floor tile mesh itself. Similar to previous cases I modeled a variation of the floor tile. I also used decal projection to add some dirt and some oil spills on top of the floor.
 |  |  |  |  |
|---|
Rubble & Rubish
I modeled a set of variation of cans, juice boxes, newspapers, pieces of paper and plastic bottles in order to use them around the shop as scattered rubbish. Using the foliage tool in unreal engine I scattered them around the corners and on the shelves inside the Café Bonjour.


Vertex Painting
While researching the best way to apply oil spills on the floor, I came across a tutorial on a blog, using vertex painting technique. After modifying my material I was able to paint water puddles on my floor using vertex painting. Then I created two material instances, turned the color, the roughness and viscosity of the material into a parameter. Then I set one instance for water and another for oil.
7
 |  |  |  |
|---|
References
[7] Vertex Painting Puddles available on https://www.youtube.com/watch?v=z3ycWesmKe0